🏳️🌈Unleashing Terraform:Guide to Infrastructure as Code
🌿TerraWeekChallenge:Day1 and Day2🌿


Table of contents
- 🔯What is Terraform
- 🔯What is IAC(Infrastructure As Code)?
- 🔯WHY USE TERRAFORM?
- 2) Automated infrastructure management
- 3) Infrastructure as code
- 🔯How to install terraform
- 🔯Set Up Environment for AWS
- 🔯Go to the terminal and run commands
- 🔯Understand Some Important terminologies of Terraform.
- Step 1: Create the Module Directory Structure
- Step 2: Define the Module Configuration
- Step 3: Use the Module in Your Configuration
- Step 4: Initialize and Apply the Configuration
- 🔯RESOURCES VS DATA SOURCE
- 🔯DATA SOURCE
- 🔯VARIABLES
- variables.tf:
- 🔯DATA TYPES
- 🔯Lets create a small project of creating Docker Container using terraform
- Step 1: Add Required Providers toproviders.tf
- Step 2: Test Your Configuration
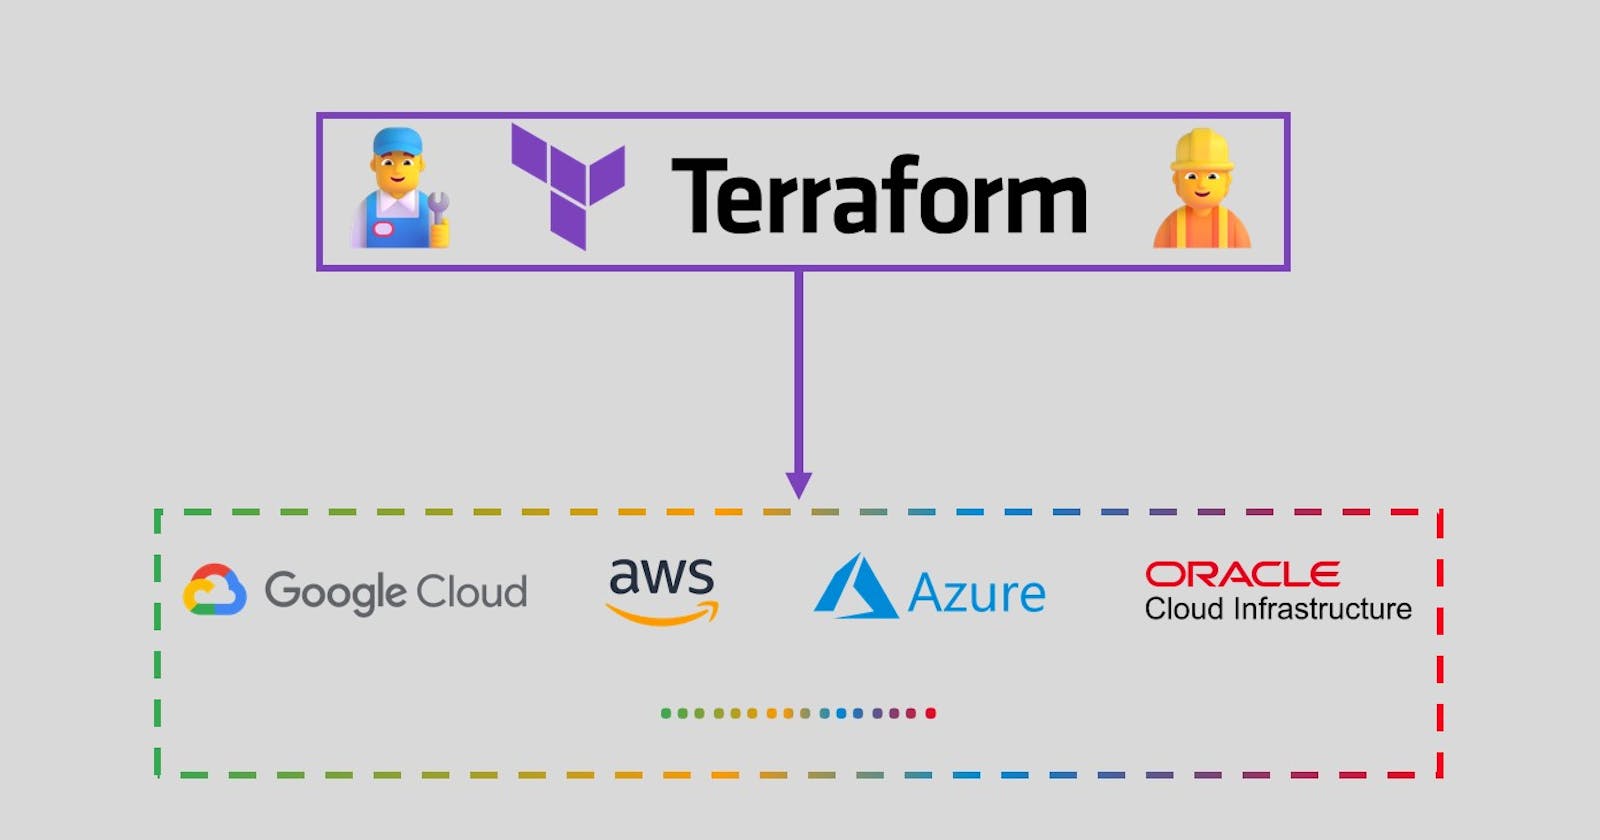
🔯What is Terraform
Terraform is a infrastructure as code software tool created by HashiCorp. It allows users to define and provision data center infrastructure using a high-level configuration language called HashiCorp Configuration Language (HCL).Terraform is wriiten in GO language. It facilitates provisioning and managing your infrastructure on-prem and in the cloud.With Terraform, developers and operators can define their desired infrastructure state as code. This enables them to create, modify, and destroy resources across multiple cloud providers using a single, consistent workflow.
🔯What is IAC(Infrastructure As Code)?
Infrastructure as Code is a way of defining and managing your infrastructure using code, rather than manual processes like clicking through a UI or using the command line. This means that you can manage your infrastructure in the same way that you manage your application code - with version control, automation, and collaboration.
Two Ways to Approach IAC:
1.Imperative approach: Imperative approach define the specific command neede to achieve the desired configuration and those commands the need to executed in the correct order.
2.Declarative approach: It defines the desired state of the system, including that resources you need and any properties they should have and an IAC tool will configure it for you.
Before the widespread adoption of infrastructure as code (IaC) tools like Terraform, infrastructure provisioning and management often faced several challenges:
Manual Configuration: Infrastructure provisioning was largely a manual process, requiring system administrators to configure servers, networks, storage, and other resources individually. This manual approach was time-consuming, error-prone, and difficult to reproduce consistently across environments.
Limited Automation: Automation capabilities were limited, with scripting being the primary method for automating repetitive tasks. However, scripts often lacked robust error handling, dependency management, and scalability, making them unsuitable for managing complex infrastructure environments.
🔯WHY USE TERRAFORM?
1) Improve multi-cloud infrastructure deployment
Terraform applies to multi-cloud scenarios, where similar infrastructure is deployed on cloud providers, or local data centers. Developers can use the same tool and configuration file to simultaneously manage the resources of different cloud providers.
2) Automated infrastructure management
Terraform can create configuration file templates to define, provision, and configure resources in a repeatable and predictable manner, reducing deployment and management errors resulting from human intervention. In addition, Terraform can deploy the same template multiple times to create the same development, test, and production environment.
3) Infrastructure as code
With Terraform, you can use code to manage and maintain resources. It allows you to store the infrastructure status, so that you can track the changes in different components of the system (infrastructure as code) and share these configurations with others.
🔯How to install terraform
Download the appropriate Terraform binary for your operating system from the official Terraform website: Terraform Downloads.
- Install Terraform on Ubuntu
Ensure that your system is up to date and you have installed the Required Packages
sudo apt-get update && sudo apt-get install -y gnupg software-properties-common
Install the HashiCorp GPG key.wget -O- apt.releases.hashicorp.com/gpg | \gpg --dearmor | \sudo tee /usr/share/keyrings/hashicorp-archive-keyring.gpg > /dev/null
Verify the key's fingerprint.
- - gpg --no-default-keyring \--keyring /usr/share/keyrings/hashicorp-archive-keyring.gpg \--fingerprint
Add the official HashiCorp repository to your system.
- echo "deb [signed-by=/usr/share/keyrings/hashicorp-archive-keyring.gpg] \apt.releases.hashicorp.com $(lsb_release -cs) main" | \sudo tee /etc/apt/sources.list.d/hashicorp.list
Download the package information from HashiCorp
- sudo apt update
Install Terraform
- sudo apt-get install terraform
🔯Set Up Environment for AWS
1.Install Terraform on aws EC2 Instance:
2.Install Unzip tool
sudo apt-get install unzip -y
3.Install AWS CLI: If you haven't already, install the AWS Command Line Interface (CLI) by following the instructions in the AWS documentation: Installing, updating, and uninstalling the AWS CLI according to your machine.
Install AWS CLI
curl "awscli.amazonaws.com/awscli-exe-linux-x86_6.." -o "awscliv2.zip"unzip awscliv2.zipsudo ./aws/install
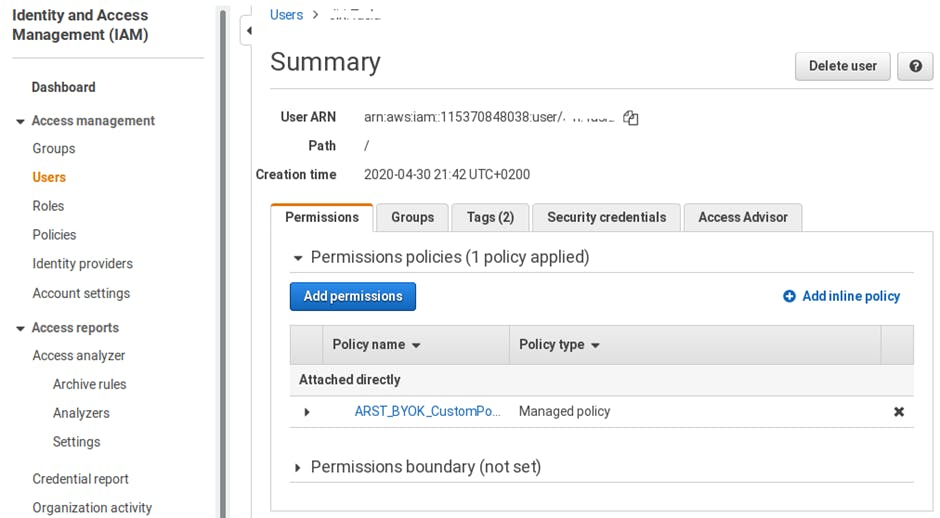
Configure AWS Credentials:
For configure AWS credentials you have to create IAM user and create user Security Credentials: Create User Secret Key & Access Key
🔯Go to the terminal and run commands
1.Aws configure
2.Enter Aws Sercret and Access key

3.Check aws cli is istanlled or not:- aws cli --version
🔯Understand Some Important terminologies of Terraform.
Provider: provider is responsible for understanding API interactions & exposing Resources. Providers are plugins that enable Terraform to interact with various cloud providers, on-premises infrastructure, Software as a Service (SaaS) offerings, and other types of systems.
Example:
provider "aws" {
region = "us-east-1"
}
In this example, the aws provider is specified with the region set to us-east-1. This tells Terraform to use the AWS provider to manage resources in the US East (N. Virginia) region.
2. Resource:A resource represents a single piece of infrastructure, such as a EC2, storage bucket, database instance, etc. Resources are declared using resource blocks in Terraform configurations.
Example:
resource "aws_instance" "terra-ec2-instance" {
ami = "ami-0c55b159cbfafe1f0" #give the ami-id
instance_type = "t2.micro”
3.State:State in Terraform refers to the current state of your infrastructure as tracked by Terraform. It includes metadata about the resources managed by Terraform, such as resource IDs, configuration, dependencies, etc. Terraform uses this state to determine the changes required to reach the desired state specified in the configuration files.Terraform stores a representation of your infrastructure objects, their interdependencies and bindings in a configuration file named terraform.tfstate.
4.Terraform Module:
A module in Terraform is a collection of Terraform configuration files grouped together to represent a reusable and shareable unit of infrastructure code.
you alreday write a moduleEven when you don't create a module intentionally, if you use Terraform, you are already writing a module – a so-called "root" module.
Any Terraform configuration file (.tf) in a directory, even just one, forms a module.
A module allows you to group resources together and reuse this group later, possibly many times.
A typical module can look like this:
.
├── main.tf
├── outputs.tf
├── README.md
└── variables.tf
Step 1: Create the Module Directory Structure
Create a directory for your Terraform configuration files and create a subdirectory named module_ec2 for the module.
codeterraform/
└── module_ec2/
    ├── main.tf
    ├── variables.tf
    └── outputs.tf
Step 2: Define the Module Configuration
Inside the module_ec2 directory, create the following files:
main.tf:
This file contains the main configuration for the module, including the definition of the EC2 instance resource.
# main.tf
# Define EC2 instance resource
resource "aws_instance" "myserver" {
  ami           = var.ami_id
  instance_type = var.instance_type

  tags = {
    Name = var.instance_name
  }
}
variables.tf:
This file defines the input variables for the module, allowing users to customize the EC2 instance configuration.
# variables.tf

variable "ami_id" {
  description = "The ID of the AMI to use for the EC2 instance"
  type        = string
}

variable "instance_type" {
  description = "The instance type for the EC2 instance"
  type        = string
}

variable "instance_name" {
  description = "The name tag for the EC2 instance"
  type        = string
}
outputs.tf:
This file defines the output values for the module, which can be used to access information about the provisioned EC2 instance.
# outputs.tf

output "instance_id" {
  description = "The ID of the provisioned EC2 instance"
  value       = aws_instance.myserver.id
}

output "public_ip" {
  description = "The public IP address of the provisioned EC2 instance"
  value       = aws_instance.myserver.public_ip
}
Step 3: Use the Module in Your Configuration
Now that you have defined the module, you can use it in your main Terraform configuration. Create a main.tf file in the root directory of your Terraform project and use the module.
# main.tf

provider "aws" {
  region = "us-east-1"
}

module "ec2_instance" {
  source      = "./module_ec2"
  ami_id      = "ami-12345678"
  instance_type = "t2.micro"
  instance_name = "myserver"
}
Step 4: Initialize and Apply the Configuration
Initialize Terraform in your project directory to download the necessary provider plugins and modules.
#terraform init
Apply the configuration to provision the EC2 instance using the module.
#terraform apply
5. Variables: HCL supports variables, which allow for parameterization of configurations. Variables are defined using the variable block and can have default values, types, descriptions, etc.
Need to undestand tha Concept of HCL SYNTAX
<BLOCK_TYPE> “<BLOCK_LABEL>” “<BLOCK_LABEL”>{
<IDENTIFIER> = <EXPRESSION> #ARGUEMENTS
}
BLCOK:- block is like a container used to define different types of objects, such as resources, providers, variables, outputs, etc. Blocks are structured elements in Terraform configuration files that encapsulate configuration settings and parameters for a specific type of object.
Structured Syntax: Blocks have a structured syntax defined by opening and closing braces {}. Inside the braces, you specify the configuration settings and parameters for the corresponding object.
Type Identification: The type of the block determines the type of object it represents. For example, a block of type resource defines a resource object, while a block of type provider defines a provider object.
Example:
resource "aws_s3_bucket" "mys3bucket" {
bucket = "mys3bucket"
}
resource indicates a resource block.
aws_s3_bucket specifies the resource type, want to create an S3 bucket.
"mys3bucket" is the resource name
Parameters: Within a block, you specify parameters that define the configuration settings for the object. These parameters vary depending on the type of object being defined. They consist of key-value pairs, where the key represents the parameter name, and the value represents the setting or value assigned to the parameter.
Arguments:Arguments are values assigned to parameters within blocks. They determine the behavior, characteristics, or attributes of the object being configured. Arguments can be strings, numbers, boolean values, maps, lists, etc., depending on the type expected by the parameter.
Syntax: Arguments are provided as values assigned to parameters inside blocks using the key = value syntax.
resource "aws_instance" "example" {
ami = "ami-0c55b159cbfafe1f0"
instance_type = "t2.micro"
}
In this example, "ami-0c55b159cbfafe1f0" and "t2.micro" are arguments assigned to the ami and instance_type parameters
Nested Blocks:HCL allows nesting of blocks within blocks to represent hierarchical relationships between objects.
🔯RESOURCES VS DATA SOURCE
A resource represents a single piece of infrastructure, such as a EC2, storage bucket, database instance, etc. They are defined using resource blocks in Terraform configuration files and are used to create, update, and delete resources in cloud providers or other systems.
Types of Resources
Compute Instances:
Example: aws_instance, google_compute_instance, azurerm_virtual_machineThese resources represent virtual machines or compute instances in different cloud providers.
Networking:
Example: aws_vpc, google_compute_network, azurerm_virtual_networkThese resources represent virtual networks or VPCs (Virtual Private Clouds) in cloud environments.
Storage:
Example: aws_s3_bucket, google_storage_bucket, azurerm_storage_accountThese resources represent storage containers or buckets for storing files or objects in the cloud.
🔯DATA SOURCE
A data source is used to query information from external systems or existing resources and incorporate that information into our Terraform configuration.
Data resources allow Terraform to fetch information or retrieve data from external systems, such as cloud providers, databases, APIs, etc. They provide read-only access to data without creating or managing resources.
A data source is accessed via a special kind of resource known as a data resource, declared using a data block:
data "aws_ami" "example" { most_recent = true
owners = ["self"] tags = { Name = "app-server" Tested = "true" } }
Key Aspects of Data Resources:
Read-Only Access: Data resources provide read-only access to external data sources, allowing Terraform to fetch information or metadata about existing infrastructure or resources.
Querying and Retrieving Information: Data resources allow you to query and retrieve information from external systems based on defined criteria, such as filters, attributes, identifiers, etc.
Non-Mutable: Unlike resources, data resources are non-mutable, meaning you cannot modify or change the state of external data sources using Terraform. They are used solely for retrieving information.
Let's consider an example scenario:
You want to create an AWS EC2 instance and configure it to use a specific Amazon Machine Image (AMI).
You also want to retrieve information about an existing AMI to use as a base image for your EC2 instance.
In this scenario:
You would use a resource to create the EC2 instance, specifying the desired configuration settings such as instance type, security groups, etc.
You would use a data resource to fetch information about the existing AMI, such as its ID, name, etc., which you can then reference in the resource configuration for the EC2 instance.
- Example of using a data source in Terraform to retrieve information about an existing AWS S3 bucket.
  provider "aws" {
    region = "us-east-1"
  }

  data "aws_s3_bucket" "mys3bucket" {
    bucket = "my-s3-bucket"
  }

  output "bucket_name" {
    value = data.aws_s3_bucket.mys3bucket.bucket
  }

  output "bucket_arn" {
    value = data.aws_s3_bucket.mys3bucket.arn
  }

  output "bucket_region" {
    value = data.aws_s3_bucket.mys3bucket.region
  }
In this example:
We specify the AWS provider and set the region to "us-east-1".
We use the
aws_s3_bucketdata source to retrieve information about an existing S3 bucket named "mys3bucket".We define outputs to display information about the retrieved S3 bucket, including its name, ARN (Amazon Resource Name)and region
🔯VARIABLES
Terraform variables allow you to insert values in Terraform configuration files. They are used to store and manipulate data, such as IP addresses, usernames, and passwords. They can be assigned a value, which can then be changed or used as is in the configuration execution.
Variables are declared using the
variableblock in Terraform configuration files.create a
variables.tffile to define a variable, and then use that variable in amain.tffile to create a "local_file" resource.variables.tf:variable "file_content" { description = "Content to write to the local file" type = string default = "Hello, Terraform!" }In this file:
We define a variable named
file_content.The variable is of type
string, which means it will hold a sequence of characters.We provide a description for the variable to explain its purpose.
We set a default value of
"Hello, Terraform!"for the variable, which will be used if no value is provided when using the variable.
          resource "local_file" "myfile" {
          filename = "/home/ubuntu/file.txt"
          content  = var.file_content
        }
We use the
local_fileresource to create a local file.The
filenameparameter specifies the path where the file will be created.The
contentparameter specifies the content of the file, which is set to the value of thefile_contentvariable usingvar.file_content.
TYPES OF VARIABLES
INPUT VARIABLE: when we want to specify values in your project.
variable "instance_type" {
  description = "This is EC2 instance type"
  type        = string
  default     = "t2.micro"
}
OUTPUT VARIABLE: when u want to get value from your project
They are defined within the output block in your Terraform configuration.
output "public_ip" {
  description = "The public IP address of the EC2 instance"
  value       = aws_instance.example.public_ip
}
🔯DATA TYPES
Data Types refer to the different kinds of values that can be assigned to variables, attributes, and expressions
1.String: Represents a sequence of characters. Strings are enclosed in double quotes " ".
Example: "example-string"
2.Number: Represents numeric values, including integers and floating-point numbers.
Example: 42, 3.14
3.Boolean: Represents logical values true or false.
Example: true, false
4.List: Represents an ordered collection of elements of the same type. Lists are enclosed in square brackets [ ].
Example: ["element1", "element2", "element3"]
5.Tuple: Similar to a list, but allows for a fixed number of elements with different types. Tuples are defined using parentheses ( ).
Example: ("element1", 42, true)
6.Map: Represents a collection of key-value pairs. Maps are enclosed in curly braces { }, with each key-value pair separated by a comma.
- Example:
{ key1 = "value1", key2 = "value2" }
🔯Lets create a small project of creating Docker Container using terraform
Step 1: Add Required Providers toproviders.tf
Create a providers.tf file in your Terraform configuration directory and specify the required providers along with their versions.
terraform {
  required_providers {
    aws = {
      source  = "hashicorp/aws"
      version = ">= 3.0"
    }
Save the providers.tf file, Now create a another file docker.tf
resource "docker_image" "myimage" {
  name          = "dockerhubregistryname/node-app" #enter ur dockerhub image
  keep_locally  = false
}

resource "docker_container" "my_container" {
  image = docker_image.myimage.latest
  name  = "node-app"

  ports {
    internal = 8000 # enter port according to your application
    external = 8000  # enter port according to your application
  }

  depends_on = [docker_image.myimage]
}
Now save Docker.tf file.
Step 2: Test Your Configuration
Initialize Terraform to download the required providers and initialize the working directory.
terraform initValidate your configuration to ensure that it follows correct syntax and references existing providers.
terraform validateIf there are no errors, you can plan and apply your configuration to create or modify resources.
 terraform plan
 terraform apply
Follow the prompts and confirm the changes to apply your Terraform configuration.